Tutorial on images manipulation

Off topic discussion.
User avatar
fafner
Cosmic Ranger
Posts: 3522
Joined: 20 years ago
Contact:

Tutorial on images manipulation

Postby fafner » 18 years ago

Given the popularity of threads such as "Photoshop the picture games" or "Do you need a signature/avatar", I thought it would be useful that I write a tutorial about manipulating images. I will use the software Gimp, but according to what I heard, Photoshop is quite similar. The advantage of Gimp is that it is free.

File formats
Before diving into Gimp, it is useful to know about image formats. Image formats are used to store the data allowing to reconstruct the images. The important notions to know about image formats are:
  • Uncompressed: The data are stored as-is. Although there are many ways to store such images, they all end up with very big files, usually roughly the width multiplied by the height. According to the quality of the color, it may be multiplied again by 2, 3 or 4. Thus, a 1024x768 image would end up with at least 768 Kb.
  • Lossless compression: The data are compressed in a such way that the image can be reconstructed exactly as it was. Examples are gif and png formats.
  • Lossy compression: The data are compressed, but the image can't be reconstructed exactly. However, it will be similar enough with the original. An example is jpg (jpeg) format.
Most popular data formats, all supported by Gimp, are:
  • BMP: Windows bitmap. It is an uncompressed format, therefore it should be avoided for images on the Internet.
  • GIF: Compuserve GIF format. It uses a lossless compression format. It is capable of animations. However, its limitation to 256 colors, and the patent that covers its compression algorithm make the PNG format more useful when no animation is needed.
  • PNG: Portable network graphics. Like GIF format, it uses a lossless compression format. Unlike it though, it can't have animations, but it allows more than 256 colors. Its compression algorithm is usually better than GIF's.
  • JPG: Joint photographic experts group. It uses a lossy compression algorithm, and therefore can achieve a much smaller file size, at the cost of image quality. By setting the precision when creating a jpeg image, one can alter the quality of the image to reduce the size of the file. This format will almost always be the best choice for very large images.


Additionnaly, Gimp supports the format XCF, wich can handle everything that other formats can handle. For example, it can store images with multiple layers, each one having an alpha channel (transparency). None of the popular image formats described above can handle this combination. The downside is that this format generates very large files, and is usually not understood by browsers. It can be useful to store images when working on them though. When an image is done, it can be converted to a format more appropriate for download/display.

Converting an image
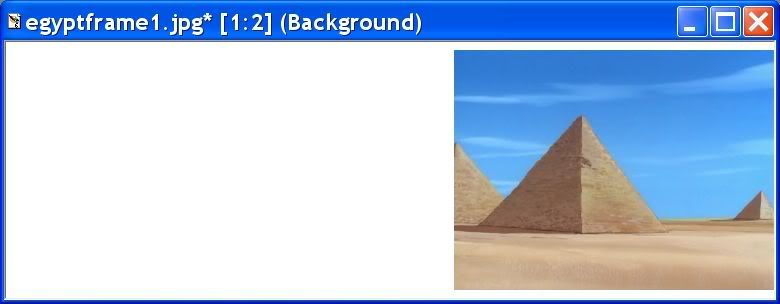
Let's take as an example this PNG image (421 Kb). It is unsuitable to display in a page because of its size, therefore it would be useful to convert it to JPG format.
First launch Gimp, then open a file by clicking on File->Open, then on the Open button:
Image Image
On the newly created window, click on File->Save as:
Image Image
You can change directly the extension of the file from png to jpg, or click on "Select file type (by extension)" to select one of the proposed formats (a lot!). Once you have chosen your file format, click on Save. You will then get a dialog box according to the format you chose, which will allow you to configure further. If you chose jpg, you will get this:
Image
Most of the settings can be left as-is. My suggestion would be to check "progressive" as most browsers support it now. A quality of 50% should be enough for most cases, and can be degraded as far as 25% in many cases. You should do several tries to see what quality is the best to your taste.
After the settings are according to your taste, click on "OK", and you are done! :)
Using this, you can convert almost any existing image format to any other image format.

Using layers
For this part, it will be useful to save the work (partial or complete) using XCF format, then export the image to jpg for publishing.
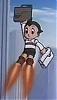
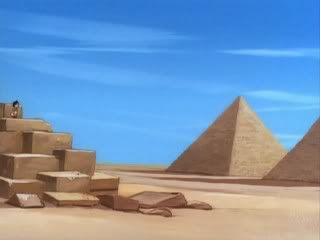
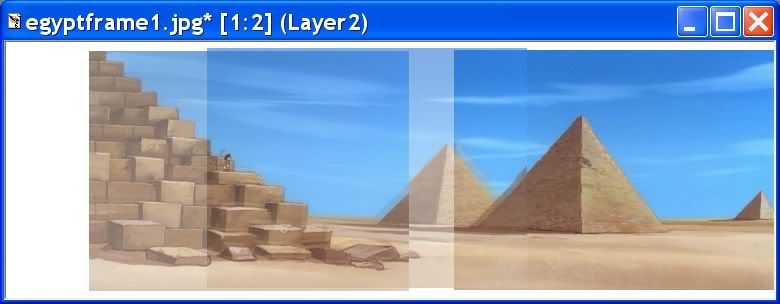
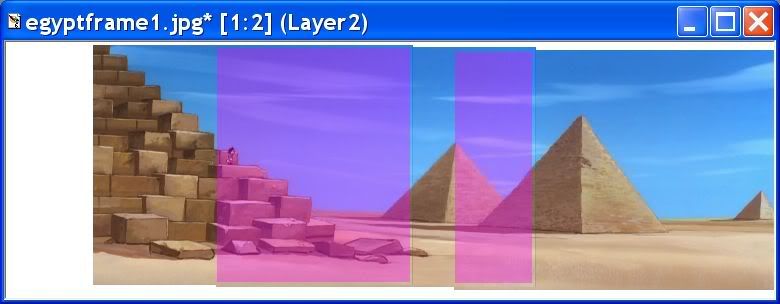
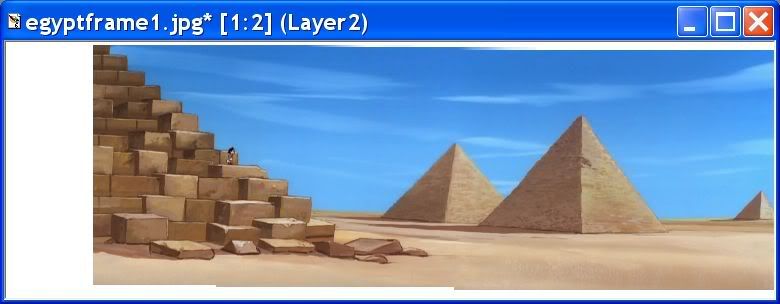
I will use this image (23 Kb) as an example. You can download the background (278 Kb) to try yourself.
Once you have loaded the image, the layers window should look like this:
Image
Click on "New layer" (1), and you will get this dialog box:
Image
You can change the name of the layer to "Titanic" (or any name that fits the image you will choose), then click "OK". The layers window will appear like this:
Image
Because the TV screen must appear above the image which will be put into the newly created layer, the order of the layers must be changed. Lower the newly created layer by selecting it (it should be already done since it has just been created), then click on "Lower layer" (2). Once it has been done, ensure the newly created layer is still selected, and paste another image into it. Because the new layer is selected, any image you will paste will appear only in this layer. You can move the pasted image and see how it will be clipped by the TV screen. You can also click on the eyes appearing right on front of the layers in the layers window: they allow to show and hide each layer.
Once it is at a good position, click outside of the selection rectangle to anchor it in the new layer. To anchor it, you can also click on the menu Layer->Anchor layer. You can then save the image (be careful not to overwrite your background) to an XCF format, or jpg for publishing. If you select another format than XCF, you will most probably be prompted to export your image. Just click the button "Export", and it should create a flat image the same as the one in the working window.

Animated GIFs
For this example, I will use this GIF animation (382 Kb). If you want to create a GIF animation from scratch, you need to have all the different images, all having the same size, that consitute the animation. Such images are called "frames". Gimp allows to do animations by using layers. The animation will go from the first layer to the last one, that is from bottom to top.
First, open the first image. Then add a new layer by clicking on "New layer" in the layers window. If you don't remember how to handle layers, you can have a look at the previous tutorial "Using layers". This time though, the new layer has been created above the previous one, and since we want the new layer to appear after the previous one in the animation, it is already at the correct position. Make sure the new layer is selected, then open the next image, select the whole area (menu Select->All), copy it to the clipboard (menu Edit->Copy). Go back to the GIF file, and paste the image in the new layer (menu Edit->Paste). Proceed the same way for all images, adding each one in a new layer. To save the animation, click on the menu File->Save as (be careful not to overwrite your first image), and enter a file name with "gif" as extension, then click on the "Save" button. You will get the following dialog box:
Image
You want to save an animation, and not flatten to one image. So click on "Save as animation", then on the "export" button. You will get this dialog box:
Image
Be sure that the "Loop forever" option is checked (it should be), then specify the speed of the animation, by entering the time each frame must stay. Usually, 100 ms (milliseconds) should do it. You can try different values to see what will fit your taste. Once you're done, click on the "OK" button, and that's it :) You can see the animation in your favorite browser by opening the newly created file with it.
If you want to vary the animation speed, for example one frame must be displayed longer, or another one shorter, you can change the speed for one frame. To do that, select the appropriate layer, then edit the layer attributes (right-click on the layer, then click "Edit layer attributes") and change the name so it ends with "(123ms)", where 123 is the time in milliseconds you want the frame to stay. Again, try different values to see how it looks.


That's all for now, if you would like other topics covered by this tutorial, just ask ;)
The real sign that someone has become a fanatic is that he completely loses his sense of humor about some important facet of his life. When humor goes, it means he's lost his perspective.

Wedge Antilles
Star Wars - Exile

User avatar
Latu
On a Flight into Space
Posts: 1236
Joined: 20 years ago
Location: Earth
Contact:

Postby Latu » 18 years ago

Yay finally a tutorial! :D
Image
"Astro, you must exceed the limitations that humans cannot!
You must be go beyond nationality, ethnicity,
pilosophy, and religion,
starvation and poverty,
and war!
Exceed these limitations created by man!
You must fly high! Higher than any human has ever flown before!
To reach for the future that no human has been able to so far!"
:tenma: :astro:

User avatar
Astro Forever
Administrator
Posts: 9806
Joined: 19 years ago

Postby Astro Forever » 18 years ago

Latu, I was going to add to this thread a tutorial on how to create animated gifs from DVDs! :D

DrFrag
Cosmic Ranger
Posts: 3397
Joined: 21 years ago
Location: Australia

Postby DrFrag » 18 years ago

Creating animated GIFs from DVDs

You will need:
DVD Decryptor (This facilitates DVD backups, and may not be legal to use in your country as it circumvents copy protection. Check your local laws regarding this. I'm pretty sure it violates the DCMA in the US, but the Manga DVDs of Astroboy have no copy protection anyway so you wouldn't need it for that. Needless to say, this forum does not condone DVD piracy.)
VirtualDubMod (This is for opening the VOB files and saving them as AVI.)
Animation Shop (This is for editing and optimising the animations. It is not a free product, just one I'm familiar with. I'm using v2 that comes with Paint Shop Pro 6)

Use whatever substitutions you feel comfortable with, the principles should be the same.
Personally, I use slightly more advanced techniques and have saved each episode as a high quality XVid to allow quicker editing, but this will do for a beginner.

Start off by copying the VOB files to your hard drive, or using DVD Decryptor. Instructions for using DVD Decryptor are in the link above, but it's pretty much the simplest programme ever - run it and click on the big copy button.

Next, you will need to open one of the VOB files with VirtualDubMod. We will be saving a section of the anime as a raw AVI file that can be read by Animation Shop.
A VOB file is basically an MPEG2 file with some extra features like multiple audio streams, so VirtualDubMod will need to parse the file. This will take a minute or two. If you're opening something with dual audio, it will ask which audio stream you want. It doesn't matter which one you choose, we won't be using the audio.
When it's done, you can scan back and forth through the file using the slider at the bottom, or the cursor keys to move through individual frames. Set the start and end points using the black arrow buttons at the bottom. Give yourself a bit of overlap, you can delete extra frames later. Avoid selecting a range of more than 100 frames, you're not going to need that many.
VirtualDubMod has masses of other editing functions, but we won't need them for this.
Select File -> Save As and save your section of animation. The default is an AVI file using uncompressed RGB, so it's going to fairly large (about 1MB per frame).

Open the AVI file using Animation Shop. Click OK for AVI Import Options, the defaults will be fine. When you've viewing the animation, you should be able to zoom in and out with your mouse wheel button.
Now we come to the editing. Clearly, a DVD rip is going to be far too large to make an animated GIF from. We need to scale it down and clean it up.
First have a look through the frames for any with "ghosting". This is where a frame looks like it's made up of a blend of the frame before and the frame after. These turn up due to changes in frame rate from the original Japanese version. Using the DVD rip method described above, you'll also probably have "combing", which is basically where every second line is from the next frame. This can be removed with deinterlacing, but that's beyond the scope of this tutorial.
So go through the animation and delete any frames that look the same, have ghosting, or have combing. We want to keep this simple and clean. Also, delete any beginning or ending frames that you want to leave out of the animated GIF.

The next step is to crop the animation. You might only want a section from the middle, or maybe something square for an avatar. Select the crop button from the tool palette, then mark the area you want to crop. When you've selected the area, scroll through the frames to make sure the crop area is good for the whole animation. When you're satisfied, double-click inside the crop area.

Save your file at this point, because the next bit involves some trial and error. Save it as an MNG file, this will keep all the file information. MNG is the animated version of PNG, but not widely supported.

The next step is resizing. Click on Animation -> Resize Animation. If you're working from an anamorphic source (that is, the picture looks stretched and the circles aren't round) this is a good opportunity to correct the aspect ratio.
What should you resize it to? That's up to you. Anything big will massively affect the file size. Avatars can't be bigger than 100x100, and sigs can't be more than 100 in height (it's unlikely the width will be a concern here).
Keep in mind the number of frames too. We're not going for DVD quality, just something big enough so that people can recognise it. Also, GIF pictures are limited to 256 colours, so a bigger animation will have more pixels and will look unevenly coloured.

When you've scaled it down, click the View Animation button on the toolbar. This will show what the final animation will look like. It'll probably be too fast, what with the ghosting frames and duplicates removed. Turn of the View Animation and go back to the frame-by-frame view. You can right-click on each frame and select Properties, then change the display time. I tend to use 10 to 20 hundredths of a second. Click the View Animation again to see if you have the correct speed. Rinse, repeat.
(you can select all the frames with CTRL-A if you want to change all the timings at once)

When you're happy with the appearance of the animation, click File -> Save As. We're gonig to save it as a GIF file. Use any filename you like. You'll be prompted to choose the animation quality. I recommend level 3 (128 colours) or level 4 (256 colours). You don't need to worry about the other optimisations. If your animation doesn't appear to have a broad range of colours, go for 128 colours. You might even be able to get away with 64.
Once you've chosen, it'll save the file and tell you how big the optimised file is. Pay close attention to the file size, because if you've ended up with something like 500k or more, you might want to post a link to the animation rather than the whole animation itself. Some people are still on dial-up connections.
If the file is too big, load your previously saved MNG file and try more restrictive size and compression settings. You can get remarkably smaller files with a bit of practice.

That's pretty much it. Leave a message if you get stuck or need more detailed information.
You can get free image hosting from Photobucket.
Image

User avatar
Astro Forever
Administrator
Posts: 9806
Joined: 19 years ago

Postby Astro Forever » 18 years ago

I was beaten! :p Good work, DrFrag! :cool: I didn't even know of VirtualDubMod, I'm still using either VirtualDub-MPEG and VirtualDub 1.5 for avis. I think it's time to upgrade! :D

I still have a few tips to add:
  • Strange Wings uses Animake to create animated gifs. You can use it for free, however if you don't buy it, you'll be stuck with advertising. From what I've seen from Strange Wings' animations, it seems to give very good results!
  • I get cleaner animations when I don't reduce the size in the animated gifs software, but right in VirtualDub before. I guess which part of the image I'll keep and estimate what the height should be, and then set the width so I'll have my 4:3 proportion (or 15:9 depending of your source) when I'll save the file. Now I use a different animated gifs software than the ones previously mentioned, so maybe your animation software will give you much better results than mine. However, should you want to reduce the size in VirtualDub, assuming it didn't change between the versions I'm using and DrFrag's, you can reduce the size by clicking on the "Video" menu, then "Filters", then "resize". One day I noticed a sequence with a lot of action didn't come out well in a video I had made and I noticed that changing the filter mode from "Nearest neighbor" to "Precise bicubic" gave me much better results, so you can play with it too. (Interestingly, I also have those filter modes in my animated gifs software, and it seems to be the other way around: Nearest neighbor is sometimes better. :confused: I don't understand how it works, but oh well.)
  • You'll find out that it's not easy to stay within 25 Kb for an avatar or 75 Kb for a signature. If your file is too big, you may reduce its size by using the "Optimize" option in your animated gifs software. It makes the pixels that are identical from a frame to the next transparent. Another possibility is to reduce the number of colors in the gifs. Between 256 colors and 128, the difference is barely noticeable. Sometimes I even go down to 64 colors, depending on the animation it can give an acceptable result. Here is an example: one of these files was made to be a signature. Then I decided to try to make it small enough for an avatar. Between these two files, only the number of colors is different. While I think the first one look better, the second one is still interesting. :) The difference is more visible if you look closely at Uran's pink clothes, but it moves so fast that it's not a big deal.
ImageImage

I was going to forget something: I prefer Photobucket, but ImageShack doesn't have any limit on the number of files that one can host. Animated gifs can take a lot of bandwidth and size, so I find it very convenient. While it doesn't require you to register to upload pictures, I think it's better to do so: it will allow you to keep track of all the images you have uploaded there. Otherwise, if you lose the link, you'll have to upload the file again.

I thought it'd be a good idea to make this thread sticky. :)

Edit: I just realized I talked about optimizing before reducing colors. I always try to see what the file size will be without reducing colors, since optimizing doesn't make any difference in quality. However, if it's not enough, I undo my optimization before trying to reduce the colors. I don't know if it makes a difference though. :confused: I'll let you test it. :)
Last edited by Astro Forever on Mon Apr 17, 2006 8:31 pm, edited 1 time in total.

User avatar
O2Destroyer
Rocket Ball Champion
Posts: 204
Joined: 19 years ago
Contact:

Postby O2Destroyer » 18 years ago

Not to sound like I'm totally getting into warez land (I'm not), but will one of these programs (like dvddecrypter) allow for a new dvd-r to be burned in a different format--IE, if the source is pal, can a ntsc disc be burned? I'm sure whoever came up with all the region coding crap didn't do it to keep me from playing bbc documentaries in my classroom!
Bombs vs. bombs, missiles vs. missiles and now a new super weapon to throw upon us all!

User avatar
Astro Forever
Administrator
Posts: 9806
Joined: 19 years ago

Postby Astro Forever » 18 years ago

To my knoweldge, DVD Decrypter will only allow you to get the VOB file from a DVD, or even separate video and audio files, on your hard drive. Maybe from there you can achieve what you want to do, but I don't know how. I've read it was tricky. :confused:

The only way I found to get a NTSC DVD from a PAL DVD was using my DVD recorder to record what I played on my PAL/NTSC multiregion DVD player, just like I'd do if I wanted to copy VHS cassettes. :rolleyes: It's ridiculous, most of my DVDs now are in PAL format with other region codes than my own. It means I can't play my DVDs, that I own legally and want to use legally, on regular DVD players sold here. :cry: I can't even play them all on my computer. I've set a region for my computer DVD player, another for the DVD burner and then, what do I do for other regions? :mad:

DrFrag
Cosmic Ranger
Posts: 3397
Joined: 21 years ago
Location: Australia

Postby DrFrag » 18 years ago

I've heard of PAL->NTSC conversions being done, but I don't know how. In Australia pretty much all DVD hardware supports both so it's not something I've toyed with.
Image

DrFrag
Cosmic Ranger
Posts: 3397
Joined: 21 years ago
Location: Australia

Postby DrFrag » 18 years ago

Creating a panoramic screenshot

Anime is often filled with great scene pans, because it fills a lot of animating frames with a single drawing. When you look at them as a single widescreen shot they can look quite impressive. This tutorial will show you how to assemble a seamless panning shot as a single long picture.

The scene I'll use for an example is from Astro's arrival in Egypt in The Return of Queen Cleopatra from the 80s series. The campera pans left across a scene of the pyramids to Astro standing at the base of a step pyramid.

Familiarity with screen capture and basic picture editing (including layers) is assumed.

Here's an animated GIF (put together using my tutorial above) of how it plays out:

Image

So it fades in, accelerates left, pans, zooms in on Astro and crossfades to a closeup.

What we need to do is take a series of overlapping screenshots that cover the range of the panning. This is pretty simple, but it's worth mentioning which frames to avoid.

We'll assume the source is a DVD. This is generally going to have pretty clear pictures, but due to frame rate changes from the original Japanese into NTSC (and then again into PAL for the Australian release), there are some frames that are a bit blurry. You don't notice this when it's playing, but here's a close-up of a bad frame:

Image

18 frames later the same area looks like this:

Image

As you can see, the frame rate mismatch happens to re-align at this point, and we get a nice clear picture. This is the kind of frame we want to capture for the panoramic shot.

So going through the pan, I've picked out these slightly overlapping clear frames:

Image
Image
Image

These are scaled down of course.

It only took three shots to cover this pan, which is pretty typical. If you're working with a diagonal pan, sometimes you need twenty or more to cover all the material that briefly passes the side corners.

Next, we load them into Paintshop Pro.

The technique for blending the edges seamlessly involves putting each picture on a different layer, then erasing the overlap with a large soft-edge erase tool. The blends out any inconsistencies. It's not too bad with newer anime, but old material often doesn't pan perfectly straight or can have slight colour changes.

So taking the first frame, we expand the canvas to encompass the final size, like this:

Image

The picture (and the white around it) become the background layer. Don't worry about the extra space, this gets cropped later and it's always good to have some working room.
Incidentally, I'm working with 640x480 screenshots and I've enlarged the canvas to 1536x512.

Then we place the next two frames on as new layers.

Image

I've made the two new layers a bit translucent and off centre so you can see where they are. This also helps when lining them up.

Image

So I've lined them up but ... uh oh ... the edges aren't straight. It looks like this is one of those pans where it moves slightly up as it goes across. It also looks like the colour doesn't match at the edge of each screenshot. This is where the layer process pays off.

Image

Since the screenshots overlap a bit, there are areas that exist in the screenshot layer and the layer below. I've marked them in pink. These are the areas we can use a fuzzy eraser on and get a nice smooth transition between the screenshots.

Image

I'm using a square eraser, size 255, hardness 0, opacity 100, step 17, density 100. This is basically a large square eraser with extremely fuzzy edges. As I erase the ugly edge of the screenshot, the overlapping screenshot below comes through and looks perfectly smooth.

Image

Continuing this process, we're left with a smooth panaramic picture. All that's left to do now is collapse the layers to a flat image and crop the white away. In this picture I had to crop the top of the left side and the bottom of the right side, because of the pan not going completely level.
In the 2003 series I expect the panning is done with computers, so you don't get this problem.

Here's the final product, full size:

http://i49.photobucket.com/albums/f260/doctorfrag/egyptpan.jpg

It's 1362x469. Good enough to frame! :D

There are so many beautiful scenes when you look at them like this. If anyone else has a go at this please start up a new thread to show us what you've done.
Last edited by DrFrag on Wed May 24, 2006 1:29 pm, edited 1 time in total.
Image

User avatar
Strange Wings
Beyond the Stars
Posts: 2713
Joined: 20 years ago
Contact:

Postby Strange Wings » 18 years ago

:w00t: Wow, the end result is looking pretty awesome! :w00t:

:cool: Thanks a lot for the detailed crash course in making panorama pics. I too made a few by myself a while ago but never managed to join the frames smoothly without having those rough edges at each side. I'm guessing it's hard getting them erased properly just by using Windows Paint.

But, alas, I don't own Paint Shop Pro yet... :(
「頼むから、仕事をさせてくれ」
- 手塚治虫先生の最後の言葉


Return to “General Discussion”

Who is online

Users browsing this forum: No registered users and 12 guests